Showing posts with label recipes. Show all posts

Tuesday, October 23, 2012

Veganmofo: Fuck yes pumpkin! Pumpkin Pie Loaf/Muffins

This recipe is a based of Yellow Rose Recipes Aloha Bread and The PPK's Pumpkin Bread and various PPK pies with coconut milk.

I didn't write down the exact ratios so please let me know if you try this! This recipe made a double batch of muffins and fairly large loaf for me.


Pumpkin Pie Loaf or Muffins

Dry
  • 2 cups white flour
  • 1 1/2 cups whole wheat flour
    2 tps baking soda
    1 dash of salt
  • 2 cups dark brown sugar
    2/3 cup white sugar
Proximately:
  • 1 1/2 TBS cinnamon
  • 2 tsp nutmeg
  • 1 tsp mace
  • 1 tsp cloves
  • 2 tsp ground ginger
  • 1 tsp all spice (or Chinese five spice if your out like i was)
Wet
  • 2 generous cups pureed pumpkin
  • 1 cup oil
  • 1 tsp vanilla extract
    1/2 can coconut milk
    1/3 cup toasted coconut (Optional any add ins like chocolate chips/nuts would be good too)
  • earth balance for greasing

Preheat to 350 degrees and grease muffin or loaf tins with earth balance. If using coconut and it is not pre-toasted spread in single layer on pan and watch closely until colour changes.

Mix all your dry ingredients into a bowl in the order listed (I would advise sifting because I ran into issues with the baking soda clumping). Whisk together until evenly distributed. Add spices and stir again.

If you roasted the pumpkin previously like I did you can skip the preheating (just turn it down to 350 to cool)and go straight to pureeing pumpkin. Make sure to have all your pumpkin pureed in case the mixture is too dry, you don't want the wet baking soda to sit around long.

Add your pumpkin, oil, vanilla and stir to incorporate. Crack open the coconut milk and add roughly 1/2 can until the batter reaches a good consistency. Fold in your toasted coconut or other toppings.

Now divide the batter into greased muffin tins and loaf pans (I did a double muffin tin and large loaf, alternatively you can do more loaf pans or muffins to suit your preference).

Place trays into heated oven, as I had both double muffin tin and large Pyrex loaf pan side by side the muffins took approximately 40 mins and the loaf pan was done in 80 mins.

Set timer for 30 mins to be safe and check on muffins or set timer for 40 mins to check on loafs. You want an knife inserted to come out clean, if not return to oven for 20 min intervals. Remove and place on cooling rack these are super moist and might pull apart while they are still warm (messy but soo good). Allow to cool before storing in fridge with plastic wrap or in container.

 Closer look. Tasty
Enjoy alone or with Earthbalance or jams!

Monday, October 22, 2012

Veganmofo: Fuck yes pumpkin! Thai Pumpkin Soup


So along with spuratic posting comes my theme of spuratic themes for Vegan Mofo. Perhaps my favourite of all the various theme's I've been experimenting with is Fuck yes Pumpkin! which as the name suggests is me making pumpkin shit!

And I will never, ever, ever get tired of it.

Starting off with something simple inspired by the now closed Satisfaction Feast in halifax n.s. canada where they made some wicked soups one of which was a thick, creamy, spicy pumpkin soup called Thai Pumpkin.

Thai Pumpkin Soup
  • 1/2 medium pumpkin roasted and pureered [roast for an hour at 400]
  •  1 can coconut milk
  • 3 tbs red thai curry paste
  • 2 tbs corriander
  • 3 tbs cumin
  • 2 tbs paprika
  • 2 tbs yellow curry powder
  • 1 inch ginger minced or grated
  • 3 large garlic cloves minced or grated
  • 2 large onions minced
  • 3 tbs olive oil or margerine
  • 4 cups homemade vegetable stock
  • salt and pepper
To start roast and puree pumpkin (or pull some from the freezer to defrost) and chop the onions. Preheat your oil/margarine in a large dutch oven on medium heat. Once heated add your curry paste and cook for a few minutes. Add spices and cook for 2-3 mins string/scrapping the bottom to get everything toasted and bubbling.

Now add your onions and salt continuing to stir and cook until the onions are translucence (5-8 mins). Things should be smelling pretty good and you can now grate in the ginger and garlic. You want to make sure everything cooks and the flavours develop but nothing burns so adjust heat as needed.

Once things are smelling good, add your pumpkin and stir/cook for 5 mins. You want to make sure the spices/onion are evenly throughout the pumpkin and it is heated through. Slowly pour in your stock until you reach the desired thickness cover and boil for 20-30 mins stirring occasionally. The soup should thicken up a bit and smell awesome. Turn down the heat and add the coconut milk, stir to thicken.

Here you can either eat immediately or if your patient you can let it cook for a bit more to mix up the flavours.


Eat with bread/naan or toppings:
  • cajun roasted pumpkin seeds
  • coarse sea salt
  • earth balance swirled
  • crushed chili flakes
  • drizzle of siracha or hot sauce
  • vegan coconut yogurt swirl

Happy Fall Mofo-ers!

Sunday, October 16, 2011

Pumpkin French Toast Casserole (or banana, apple, other fruit)

This is basically my lazy, casual rendition of French toast, with less work. This recipe is about using what you have on hand or things that you may have no other use for or are about to get up and leave you.

The original Recipe is from Vegan Brunch by Isa, amazing book and worth your hard earned money.

This recipe is great for when you have some stale or dry bread that is past it's prime. Because this recipe is the my lazy vegan version, you can use any old bread or an assortment of breads. No matter how old, dry, stale, hard, broken or decrepit it is, because instead of perfect slices our bread is going to be cubed, torn and shredded. I also made sure to save and add all the bread crumbs I had laying around, so dump out those bags and scrap your cutting boards! Waste not, want not.

This recipe is all about using what you already have, so experiment and substitute to suit your needs. If you don't have pumpkin try squash, banana, fruit compote, sweet potato, apple sauce. Anything!

What you will need:
Baking Dish
Bowl
Cutting Board

Ingredients:
1 cup canned pumpkin (alternative, depending on what you have could be apple sauce, compote, mashed bananas)
1 cup almond milk (or any other vegan milk)
2 T corn starch (again, it you like potato or other starches use them)
2 t cinnamon
1 t nutmeg
two shakes of all spice
optional: Earth balance for buttering the baking dish and dotting the top
Optional add ins: Anything you have laying around, nuts (whole, broken, ground), coconut, dried fruit, chocolate chips, oats, flax seeds, this is your dish and it is about using what you have.

Add ins can either be mixed with pumpkin mixture, or tossed with the bread, or even sprinkled over top of the dish! Whatever you want.

a little liquid from jarred ginger or a little bit of grated fresh ginger (again, this is to taste so for stronger bite add more)
expired bread, I had a good 3/4 loaf but you could round this out with fresh bread, all bread crumbs or any bread like items you have around.

Dice your bread into bite sized cubes or tear into chunks if using soft bread save all end pieces, crumbs, fluffy bits and odds and ends. Set aside.

Mix everything else together in a bowl and preheat your oven to 350.

Place all your bread into a shallow rimmed baking dish (you can use a casserole dish or deep dish, this will result in a softer casserole. As the pumpkin mixture is pretty wet, and depending on how hard/dry your bread is you may want more layers to keep in moisture.) Since I like mine less-moist and a little crispy, I'm using a shallow baking dish so my bread is effectively in a single layer.
Pour pumpkin mixture over bread and let sit until oven is ready, the longer it sits the more it absorbs and the softer it gets. So depending on the tough/dryness of your bread and your preference for soft/pudding style eats you may want to let it sit longer.
Alternatively you can prepare this and place it in your fridge to dish out smaller amounts to cook on an as needed bases. Or even fish out your bread cubes to fry, traditional French toast style throughout the week. MMM
But since I'm being lazy, I'm just gonna plop the whole mess in the oven and not let it sit very long. About 12 minutes, stir let it sit another 12, then bake.

Baking time was around _____, again if you'd like a more pudding style dish you could stir/mix it as it cooks and reduce the cooking time.

Voila!

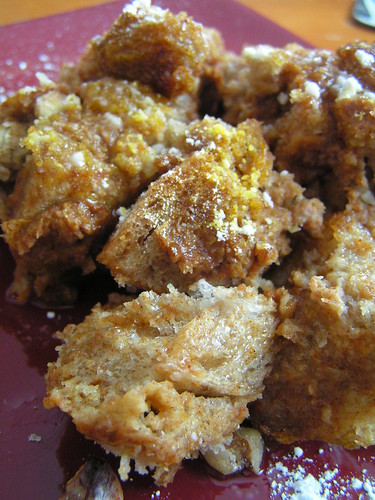
Serve alone, dusted with sugar, spices, citrus zest, berry sauce, syrup, ice cream or w/e.

Friday, October 7, 2011

Veganmofo: Cheddar Onion Biscuits:Cooking from the Mofo Feed

During one of my feverous Mofo Reader comment-a-thons I came across Mo's post on Best Thing You Never Ate where she posted these amazing biscuits!
So simple and flavourful, they come together quickly. I wasn't making gravy but I wanted a flavourful biscuit for breakfasts and to round out my lunches. Plus Diaya's been on sale here recently so I have a stock pile and Green onions were 99cents!

I followed Mo's Recipe with the following changes:
  • I subbed Earth Balance Margerine for Shortening (because I oddly had none left)
  • And I subbed 1 cup of WW Flour for the white and used WW to roll out the dough.
  • Used a sili-pad to bake them on, so I didn't bother with the greasing
  • I did a soy milk brush glaze on the second batch to go into the oven as well as played with some shapes.
The almond milk didn't seem to curdle as much as I expected, but I added it anyway. I also seem to have lost my Pastry Cutter, so I used my Mezzaluna and some butter knives/forks. It worked out OK, not supper pebbly but manageable.

I used a mason jar to cut my biscuits and played with the remaining dough to make tiny hand pies and some braids to see how they'd bake up!

The first batch cut with mason jars and rolled maybe 1 inch thick? Were in for 25 minutes before I checked on them.They didn't brown a whole lot on the top, but the were pretty firm. The second free-formed batch where much bigger and I think that helped them to get a flakier texture.
Sorry about the bad lighting. But there had to be a fresh outta the oven shot.
It turns out the smaller, denser biscuits that were rolled pretty thin because extra fluffy when microwaved the next day. All and all these are super flavourful and pretty damn tasty biscuits to stuff your face with!
I used a silipat  to bake mine, 


Saturday, March 20, 2010

Pumpkin French Toast Casserole (or banana, apple, other fruit)


This is basically my lazy, casual rendition of French toast, with less work. This recipe is about using what you have on hand or things that you may have no other use for or are about to get up and leave you.

The original Recipe is from Vegan Brunch by Isa, amazing book and worth your hard earned money.


This recipe is great for when you have some stale or dry bread that is past it's prime. Because this recipe is the my lazy vegan version, you can use any old bread or an assortment of breads. No matter how old, dry, stale, hard, broken or decrepit it is, because instead of perfect slices our bread is going to be cubed, torn and shredded. I also made sure to save and add all the bread crumbs I had laying around, so dump out those bags and scrap your cutting boards! Waste not, want not.

This recipe is all about using what you already have, so experiment and substitute to suit your needs. If you don't have pumpkin try squash, banana, fruit compote, sweet potato, apple sauce. Anything!


What you will need:

Baking Dish
Bowl
Cutting Board

Ingredients:
1 cup canned pumpkin (alternative, depending on what you have could be apple sauce, compote, mashed bananas)
1 cup almond milk (or any other vegan milk)
2 T corn starch (again, it you like potato or other starches use them)
2 t cinnamon
1 t nutmeg
two shakes of all spice

optional: Earth balance for buttering the baking dish and dotting the top
Optional add ins: Anything you have laying around, nuts (whole, broken, ground), coconut, dried fruit, chocolate chips, oats, flax seeds, this is your dish and it is about using what you have.
More Options: If you don't want to serve the casserol with syrup or sugar, I would add brown sugar or maple syrup directly to the pumpkin mix to bake in the sweetness so no toppings will be needed.

Also, if you bread mixture looks a little dry once all the juices are absorb splash some more almond milk on top.

Add ins can either be mixed with pumpkin mixture, or tossed with the bread, or even sprinkled over top of the dish! Whatever you want.

a little liquid from jarred ginger or a little bit of grated fresh ginger (again, this is to taste so for stronger bite add more)
expired bread, I had a good 3/4 loaf but you could round this out with fresh bread, all bread crumbs or any bread like items you have around.

Dice your bread into bite sized cubes or tear into chunks if using soft bread save all end pieces, crumbs, fluffy bits and odds and ends. Set aside.

Mix everything else together in a bowl and preheat your oven to 350.

Place all your bread into a shallow rimmed baking dish (you can use a casserole dish or deep dish, this will result in a softer casserole. As the pumpkin mixture is pretty wet, and depending on how hard/dry your bread is you may want more layers to keep in moisture.) Since I like mine less-moist and a little crispy, I'm using a shallow baking dish so my bread is effectively in a single layer.


Pour pumpkin mixture over bread and let sit until oven is ready, the longer it sits the more it absorbs and the softer it gets. So depending on the tough/dryness of your bread and your preference for soft/pudding style eats you may want to let it sit longer.

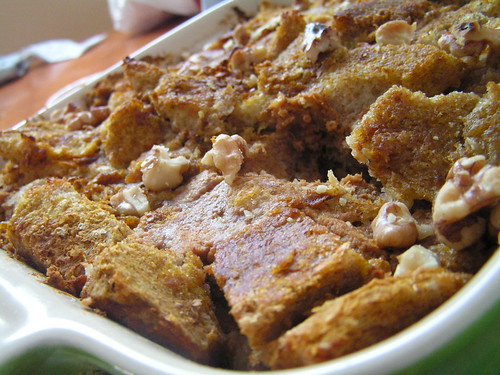
I added broken walnut pieces to mine and mixed them in last. Mine also looked a little dry so I added a splash of soymilk on top and dotted it with Earth Balance.

Alternatively you can prepare this and place it in your fridge to dish out smaller amounts to cook on an as needed bases. Or even fish out your bread cubes to fry, traditional French toast style throughout the week. MMM

But since I'm being lazy, I'm just gonna plop the whole mess in the oven and not let it sit very long. About 12 minutes, stir let it sit another 12, then bake.

Baking time was around 15-20 mins, again if you'd like a more pudding style dish you could stir/mix it as it cooks and reduce the cooking time.

Voila!

Now because I didn't add any sugar to the casserole the end result isn't overtly sweet. I prefer to sweeten it to taste on the plate with icing sugar and maple syrup (I also lived with my dad, who hated sweets so I tend to let people add their own sugar). However, if your looking for a sweetened dish ready scoop and eat, I would mix in some maple syrup or brown sugar right into the pumpkin puree.

Serve alone, dusted with sugar, spices, citrus zest, berry sauce, syrup, ice cream or w/e.

alternatively if you like pumpkin, you could make this a savory dish by adding sauted garlic, Rosemary, thyme and onions to the pumkin mixture and extra earth balance.

Wednesday, January 14, 2009

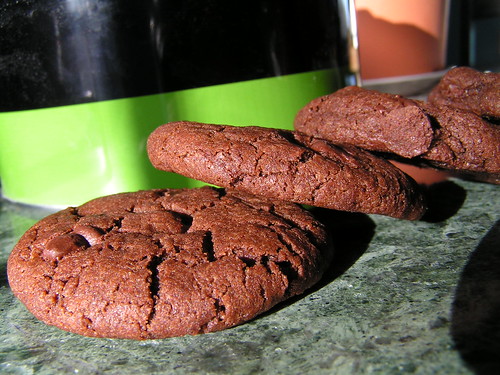
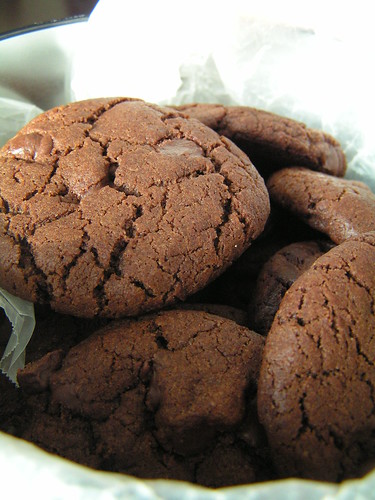
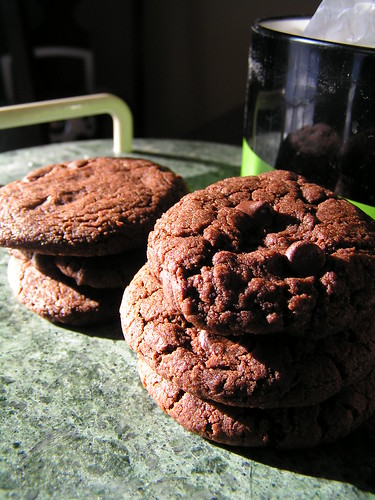
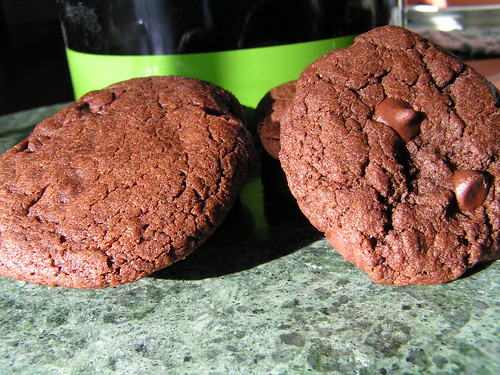
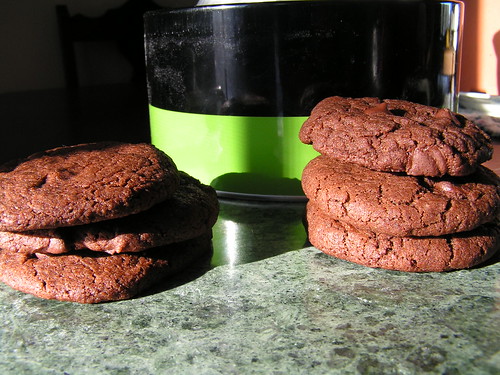
Decadent Double Chocolate Peanutbutter cookies


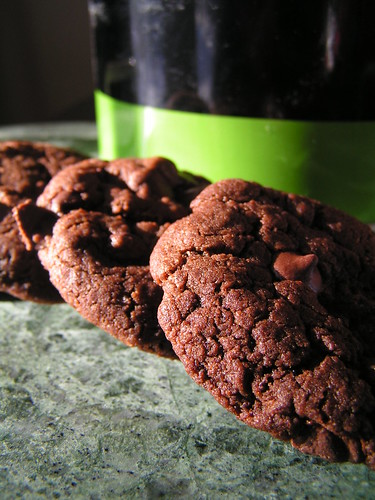
If there were only one cookie in my life (were a the monogamous cookie kind) this would be it. These rich, chewy, chocolate, creamy delights are more than any cookie lover could hope for.

These are a simple altered version of Isa's Double Chocolate Cookies found here.
The original recipe is great, so be sure to check her out along with her amazing books.

My batter wasn't terribly hard like the recipe describes and I was able to stir it fine with a wooden spoon (to avoid losing punk points!). This batter however is oily, so be prepared to get your hands messy and moisturized! I used a coffee grinder to grind the flax seeds and simply whisked in the soymilk.

So, here is the twist to making these cookies fantastic. Peanut butter. I only added a 1/4 cup, but I will soon be trying these with larger amounts. This gives the cookies a subtle and not overwhelming peanut butter flavour. The other change I made was to use a generously filled table spoon measure to form even balls of dough.
I also ignored the part about pressing down the balls of dough which resulted in smaller, thicker cookies which I liked more. Try it both ways and see which you like more, here is an example of the original method of pressing and next to it the non-press method.

These are omni approved, although be warned the bestowing of these cookies may result in socially awkward exclamations such as"this cookie is so good it's giving me an erection".

Friday, December 5, 2008

Good morning


As per usual I open one of my cookbooks find something that looks good, seems do-able. And then I make something completely different. Today it was pancakes and for the first time ever, it seems I have made a pancake recipe I can actually cook! For the first time ever I have cooked pancakes by myself.

Now these cakes are pretty dense and easy to flip in the pan with a wrist toss, you know like those pros do. These are not your fluffy light pancakes, they are almost biscuity in texture but certainly filling in the morning.

Chocolate Banana Pancakes
1 cup WW flour
1 tsp Cinnamon
1/2 tsp Sea Salt
1/4 cup Cocoa
2 tsp Baking Powder
1 1/4 cup of Vanilla Soy Milk (or non-dairy milk of choice)
1 Tbsp Canola oil + more for greasing pan
1 Banana sliced as thick or thin as you like

In a large bowl combine your flour, cinnamon and sea salt. Be sure to sift in your cocoa and baking powder to remove any lumps. Next measure out your soy milk in a large liquid measuring cup and add your canola oil and mix in the measuring cup. Don't be alarmed that the batter is pretty thick. Now add your wet ingredients to your dry. Now gently stir in your banana slices.

Oil your non-stick skillet and heat the pan on medium high heat until heated through, then reduce your heat to medium/medium-low and let it settle. Using a big spoon scoop batter into the center of the pan, using a spoon to flatten the batter (this can be tricky). Wait until bubbles form around the edges and then toss your pancake. Be sure to press down the flipped cakes, once cooked transfer to a plate in the oven to keep warm. Repeat with remaining batter.

Serve with a berry laced syrup or plain sugar/maple and earthbalance.


Friday, October 17, 2008

VeganMofo- New Autumn Favorite


Inspired by esme's post about apple cider doughnuts I figured it was about time Vegan House had some doughnuts. So I looked back to the last time I made doughnuts and decided to make my very own doughnut recipe based using the lovely Random Girl's as a jumping point.

If your anything like me you won't be spending all day crafting Doughnuts unless you'll have them for some time to come. So I usually double all recipes (sometimes triple), with that in mind the recipe yields more than your typical batch. So feel free to double and triple again if you like.


Autumn Cider Doughnuts

2 package active dry yeast
1 cup warm water
1 cup warm apple cider
1/2 cup vegetable margerine
1 cup sugar (I've used both brown and organic cane sugar, I suspect maple and other healthier sweeteners would work as well, so feel free to experiment and let me know how it goes)

2/3 cup more apple cider, warmed
Egg replacer equilivent to 4 eggs
4 cups whole wheat
all-purpose flour
3-4 cups all purpose unbleached flour (again, for healthier doughnuts you could get away with all WW but they may be denser) {I say 3-4 as I keep the fourth cup to help kneed the dough and have never used the full cup but it could happen}
1 tsp salt 2 tsp Cinnamon and Nutmeg (More or less depending on taste)
Oil for frying


Glaze: 2 cups confectioners' sugar 1/2 cup hot vanilla soymilk


OR

Roll in:
1/2 cup sugar
2 TBS cinnamon
optional: vanilla

Dissolve the yeast packets in 1 cup of warm water and let the mixture stand until yeast clouds form (5-7 minutes).While your yeast is puffing up in a large saucepan, bring the first cup of cider to a boil. Add the margarine and sugar and stir until the margarine has melted and the sugar is dissolved. Remove from heat and COOL [believe me, I know you want to skip this step, but DON'T!]. In a separate measuring cup dissolve egg replacer and water (follow package directions, or use your favorite egg replacer recipe). When your mixture has cooled, add the puffy yeast and more warm cider. Stir in the egg replacer and 4 cups of WW flour. Mix the heck out of it. Add remaining all purpose flour slowly, reserving one cup for kneading and add the salt and spices. Mix some more, at this point you'll need to abandon your spoon (if you haven't all ready) and get in there with your hands. Again add the flour slowly, its for your own good. Only use enough to make a soft and manageable dough. Make sure to scrap down the sides of your bowl and get all your dough out. Now take your dough to a floured board and knead until smooth and elastic. Using your remaining flour to help prevent sticking, work as much as you need into the dough. Place the dough into a large greased bowl, cover and let it rise. It should doubled in bulk after about an hour.

Now again, if you are anything like me you now need to pee and your kitchen is trashed. So use this time to clean up (it'll save you in the long run).
After the hour has elapsed and you've re-cleaned your kitchen, punch down your dough (this part is fun!).

On a lightly floured surface roll out the dough until it is about 1/2 inch in thickness. Cut out doughnuts with a a glass or roll dough into tiny dough nut holes. Place the doughnuts/dough wads a greased baking sheet space them an inch apart or so. Make holes if you want. Now let them rise again for 1 hour. Re-clean if you need to.

Now the exciting part, heat your oil to in a deep skillet or deep fryer (test with the end of a wooden spoon, if bubbles form you are ready to fry!) . Fry doughnuts in small batched (as many as will fit with outcrowding at a time), until golden on both side. Drain on paper towels or old paper bads. Prepare your glaze or your sugar coating. To make your glaze, mix everything untill smooth in a shallow bowl. While the doughnuts are hot (but not hot enough to burn you), coat them in glaze or roll in sugar. You may need to make more sugar and/or glaze as you go, the thicker the better in my books either way let your glaze dry into the delightful crunchy sweet goodness we associate with doughtnuts. Oh, and by the way if don't you dare waste any glaze or sugar mixture, if you wind up with too much once the doughnut glaze/sugar has hardened or set pour/drizzle the rest over top of you pile.


*See my last doughnut post for info on baking doughnuts, it is possible and healthier but it will change the texture/taste. If you are kosher with that, then go to town.

Enjoy! and eat some veggies for gods sake.

Sunday, October 5, 2008

VeganMofo: Iron Chef Challenge! (week one) *Rough Post, This will be fixed up*

Vegan Iron Chef Challenge, as suggested and put on by Katie so I'm doing my part here on the Farm.

As I am on my way to work, and may not make it back in time. This is just a quick informal post about my contribution to this weeks challenge.

I did one raw recipe and one cooked.

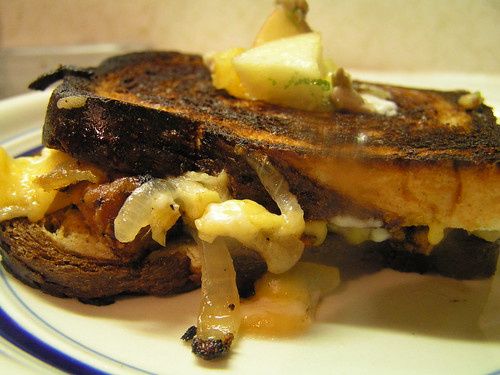
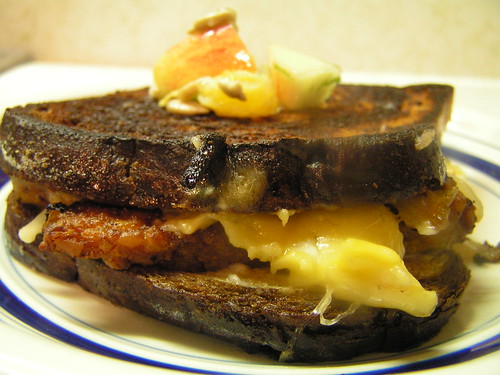
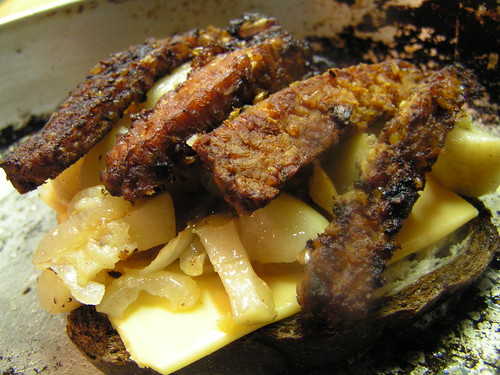
#1) Apple Ginger Tempeh Rubens

This was my first time crafting a Ruben and I have to say they turned out pretty well (photos will be sorted and added on my lunch hour, recipe included of course)


Basically saute onions (thinly sliced), with 2-3 inches of ginger and 3 cubed apples, cook until apples are soft and reduce in size. Throw mixture in oven (don't wash the pan) and fry your tempeh bacon (marinade based off vwav). To assemble toast rye bread, spread with eb on both sides, thin layer of veganaise, toffuties cheese slice, apples ginger mixture, strips on bacon, other toasted rye slice with veganaise. Cook and press in same frying pan.


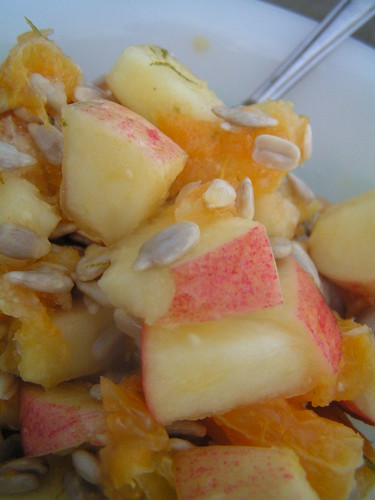
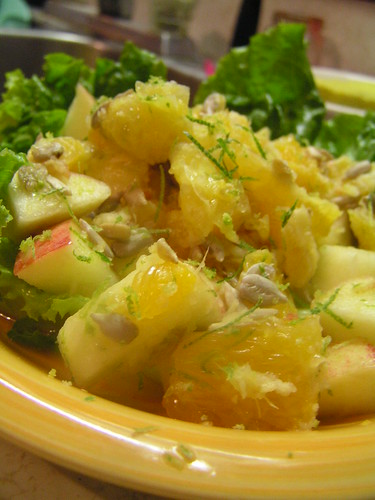
#2) Raw apple orange salad with ginger lime dressing

This is pretty basic, but I have a raw housemate and wanted him to have something to eat too.

Peel and chop oranges (6 large ones), chop a dozen apples (I used Macintosh and gala mix), and 2-3 cups of raw sesame seeds. To make the dressing peel 2 inches of ginger and puree with a handful of sliced apple, zest and juice 6 limes and add 4 heaping tablespoons of raw agave. Mix and taste, if you want more of anything adjust to taste. Combine with fruit and let sit over night or one hour.


This salad also makes an amazing topping for Hawaiian burgers or French toast stuffing. (if chopped finely an interesting relish/salsa)

Friday, October 3, 2008

VeganMoFo: Kick ass greens (as promised)


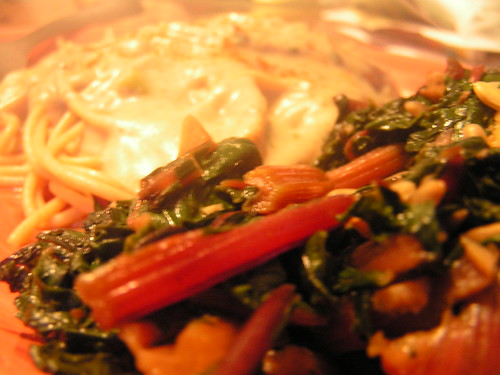
Despite the blog title, I do love me some greens and when I'm not making Kittee's amazing Collards, I like to make something like this:

Kick Ass Greens
  • One Large bunch of Greens (I used Rainbow Chard)
  • 3 Large Garlic Gloves
  • Earth Balance or other Vegan Margarine
  • Raw Sunflower seeds
  • Liquid smoke (just a few drops)
To start wash greens and get ride of any super tough ends. Mince your garlic and melt a generous wedge of EB in your pan. Add garlic and saute until fragrant and tender. As garlic is cooking, slice greens into thin long strips (I like to keep my stems and just dice them finely, their good for you!!). Once Garlic is starting to brown, add in your Seeds and roast until golden. Shake off most of the water and add your greens in batches, allowing them to cook down before adding another handful. Keep stirring and as they cook add in a few drops of Liquid smoke until that hickory scent begins to fill the kitchen. Serve as a side dish, or add to pasta sauce for a healthy kick.

These are also great is diced finely and mixed with a vegan cream sauce over pasta.

Monday, September 29, 2008

VeganMofo: Poor Gal's Soup

Here is a recipe for a soothing soup when your wallet is looking bare.


Poor Gal's Soup:
  • Tomatoes (fresh is best, but canned works or a combo of both)
  • Onion (for a milder soup, green onions are best but they are pricer)
  • Garlic (I like garlic so I use 3-4 cloves)
  • oil
  • Water
  • Seasoning: Optional but this is best with fresh thyme and a little S&P
    • Thyme*
    • Rosemary*
    • Oregano*
    • Pepper
    • Cayenne if you like the heat
    • Mix it up and use whatever you have on hand or like
*On a super budget, Italian seasoning will do and you can use granulated or powdered
onion/garlic.

This soup is great with just the bare minimal (water, tomatoes, flavorings), but some easy add ins include: Small quick cooking pasta, rice, beans or lentils, veggies like greens, zucchini, peppers and anything you like. This time I had some Quinoa (lucky me!) so I used that.

Directions:
Heat your saucepan with a little bit of oil, chop your fresh garlic and onions add them to the oil and cooked until soft. If you like you can add your spices now to flavor the oil. Chop your tomatoes (or open your can). Add them as well, cook them for 3-4 minutes and then begin adding your water, it may look thin but as the tomatoes cook down you will begin to thicken the soup base into a surprisingly think and tasty broth.


Notes: if you are adding any extras like beans or veggies you can fry them with the tomatoes or simply add them after the water. Grains or pasta (uncooked) add them once the water is boiling.

This is a great light soup, easy for when you sick or studying, and filling when your fridge is bare.

Sunday, February 10, 2008

Hodgepodge

For some reason when I woke up this morning I had a flash back to a cooking class I attended in my pregan days. We made hodgepodge with the chef (my friend and I where the only two there).

Having recently bought some local organic soymilk I decided to give it a go, veganised and improvises I give you Iron hodgepodge.

To start with you will need a large pot with salted water on medium high, as the water heats shop 4-5 medium potatoes, two carrots and a hand full of kale (reserve the tougher stalks ends to make broth on the weekends).
One water is boiling add potatoes and cook for around 10 minutes, then add the carrots. Watch for starch build up! As you wait for them to cook chop an onion and one or two bulbs of fresh garlic, you may also want to grease/prep your cast iron with olive oil. Another ten minutes and test the vegetables with a fork. If they are soft add kale and cook until everything is done. Set aside with cover on pot to cool.


As veggies cool heat the skillet then turn down the heat and add your onions and garlic. As they saute chop some oyster mushrooms (I am going to be honest, I bought some odd looking mushrooms from the market, I have no idea what they actually are but they remind me of oyster mushrooms. Any white mushroom will work). Chop them into larger pieces (I just sliced mine in half as they were thin. If you use button or "meatier" mushrooms try quarters [STEMS TOO!!]). Fry mushrooms with your sauted onions. Add pepper, nooch, paprika and rosemerry. cook until mushrooms have a little bit of texture.

Now start spooning your boil vegetables into the pan. No need to drain as your going to be using some of this broth to thin your soymilk (if using non-fat soymilk you can probably skip this part, but reserve the broth for a later use it's salty and has some of the nutrients lost from the boiling).
continue to cook the veggies until some of the potatoes begin to flake apart. Re-spice to liking as you cook. Then add in your soymilk enough to cover the bottom of the veggies and you can add more as you. As everything cooks together add some of your cooking liquid from the pot to thin the soymilk. Add whichever ratio you prefer of the soymilk and cooking broth until you reach about an inch below the top of the skillet.

Continue to cook again adding more spices as you see fit. If you have them fake bacon bits are great in this. Once heated through your ready to serve and enjoy! Serves around two I'd say.
And you're done!


Hodgepodge is originally made with whichever veggies you have lying around and particularly good with turnips. For fancier looking presentation you can peel your veggies but I like them unadulterated and this way is better for you anyways. Add more pepper, nooch and bacon bits to the top when serving. Croutons might be nice too.


Oh! Another oddity, I know this is a savory dish but it helps with the iron absorption and I like the flavour. Before you eat your bowl, squeeze a lemon wedge over the bowl. Either way it's sure to please. enjoy!
More photos, sorry about the slow quality my camera has no power: